Intentional motion blur or blurred action is an exciting trick to learn in photography! Photos with a long exposure or slow shutter speed can result in some interesting and creative photography. Most often this is done with something that is moving through a stationary scene creating an interesting image like a milky waterfall or a cityscape where the headlights and taillights streak white and red and the buildings twinkling behind.
This type of image is achieved by slowing down the shutter and creating intentional “motion blur” meaning that the action happens while the shutter is still open causing the action to blur across the frame. The length of time that the shutter needs to be open to create motion blur depends on how quickly the subject is moving.
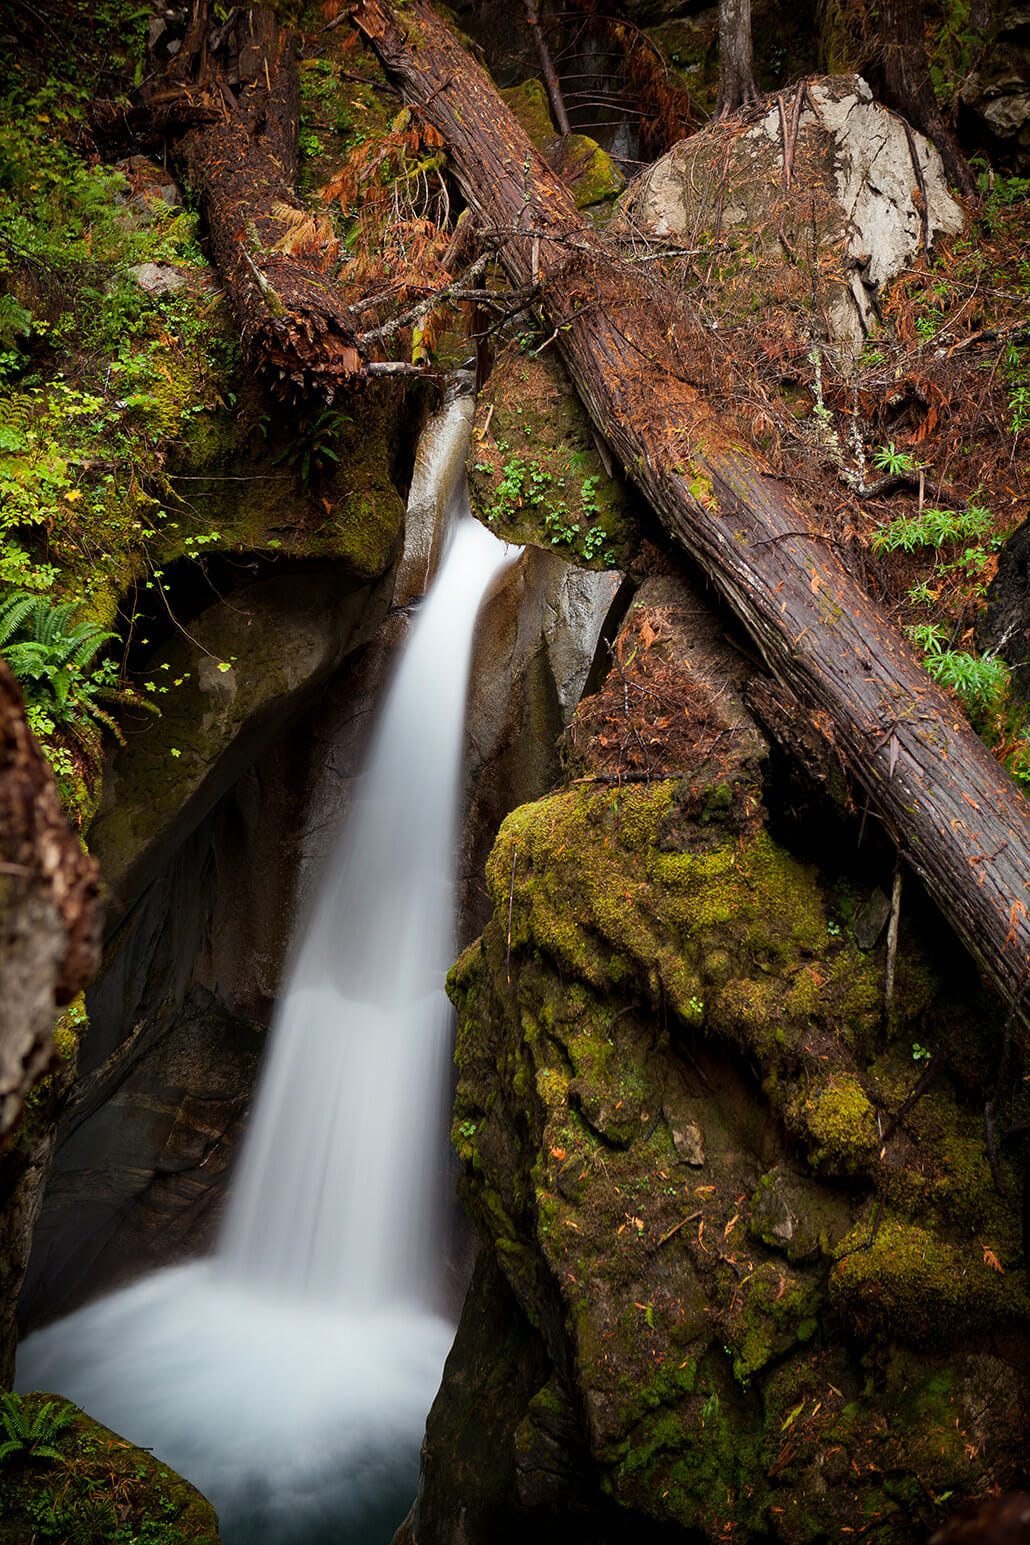
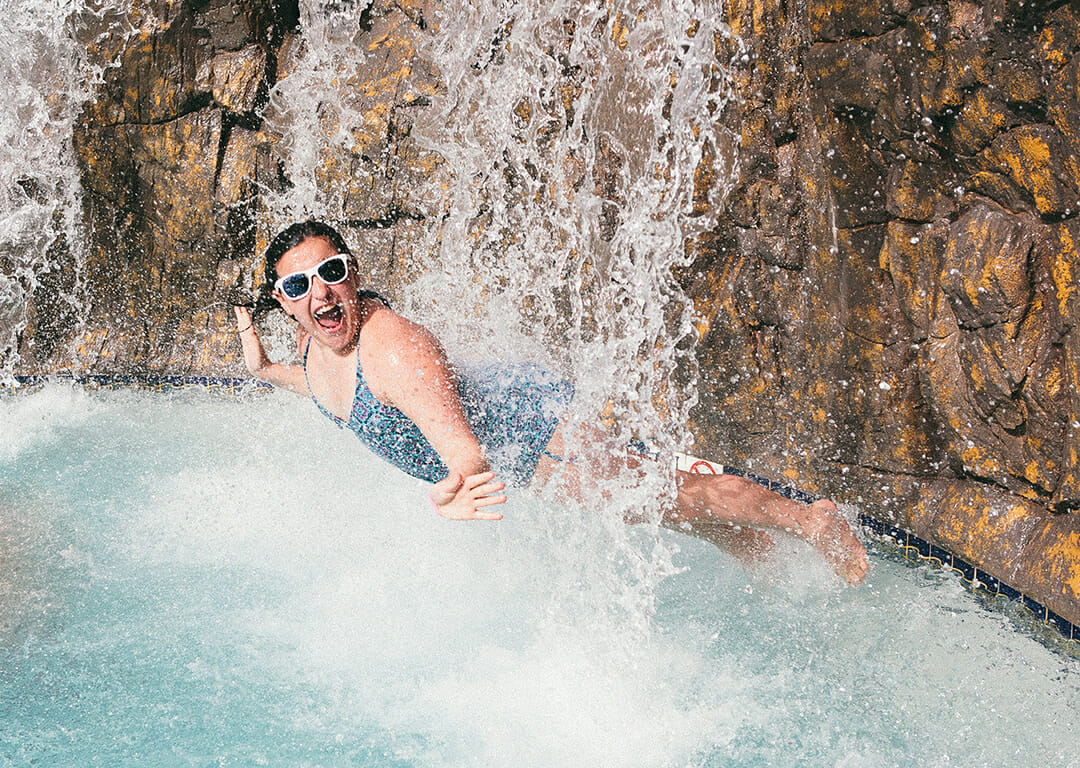
In the example of the waterfall, water is typically moving at a quick pace, so the shutter speed doesn’t need to be very slow to get blurred action. Something that is moving more slowly would need a slower shutter speed to get blurred action as in this example of the Wheel in Seattle;
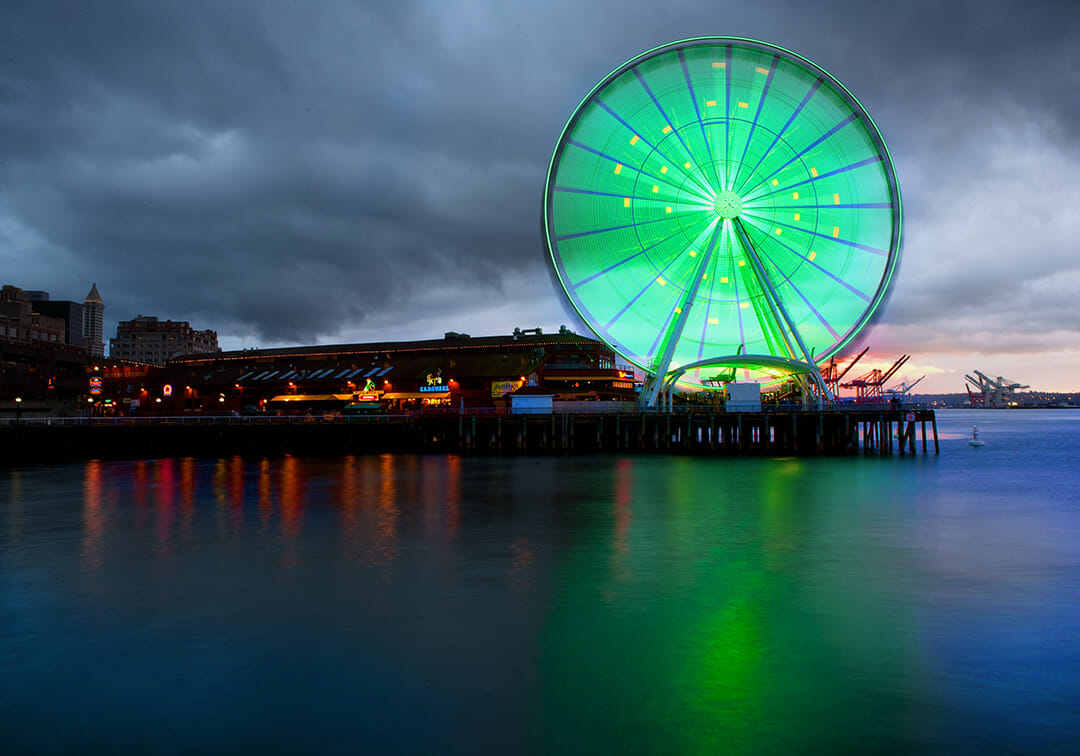
The shutter was open for a full 5 seconds (looks like 5″ in your shutter speed) to get the blurred action. And this example of the waterfall; the shutter was only for 2.5 seconds (2.5″).
Special equipment you is useful in catching blurry action;
- Tripod or something to stabilize your camera
- ND (neutral density) filter if shooting in daylight
- Remote trigger/shutter release
Tripod
The tripod or a surface to stabilize your camera is a must to catch blurry action. There’s no way around it. You won’t be able to hold a camera and shoot at slow shutter speeds. If you did, the whole image would be blurry. When buying a tripod, invest in a good one. I bought the cheapest one I could when I first started and it was so wobbly that wouldn’t stabilize so was just a waste of money. I like the ball and head type that makes it easier to clip and unclip the camera from the tripod. Something like this Manfrotto tripod would serve you well.
Neutral Density Filter
A ND filter is basically like really dark sunglasses for your camera. It allows you to leave the shutter open longer during daylight hours. In the image above of the waterfall, I used a 6 stop ND filter which allowed me to leave my shutter open for 1 second on an overcast Fall day. If it was a brighter day, I wouldn’t have been able to leave my shutter open that long. Shooting at night, like the shot of the Wheel, doesn’t necessarily require a filter but it would have been helpful to close the gaps to make a full green wheel! Follow this link for an example.
*When buying just make sure you have the right size. Look at the inside of your lens cap if you’re unsure. A common size for a kit 18-55mm lens is 58mm which is the diameter of your lens.
Remote Trigger or Shutter Release Cable
The remote trigger or shutter release cable is helpful so when you hit the shutter button you don’t cause camera shake. You can also just use the timer (usually found in the same menu as continuous shooting) for the same purpose. You just don’t want to touch the camera to take shots with slow shutter speeds.
Give it a Shot (so punny!)
I used to ignore these types of shots because I thought carrying around a tripod was a pain. Well, it kind of is! Especially when you buy a nice sturdy one. But once I started playing with some of these slower shutter speeds, I had a ton of fun! If you only stay in the faster, handheld only, shutter speeds, your missing out on a ton of fun photography!
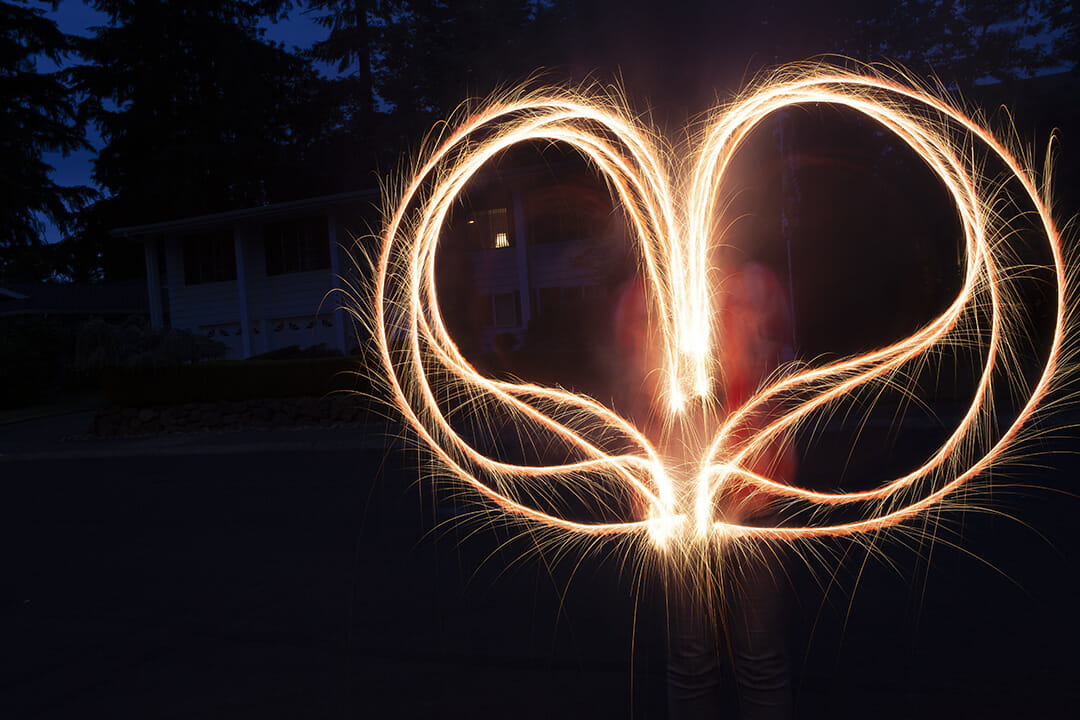
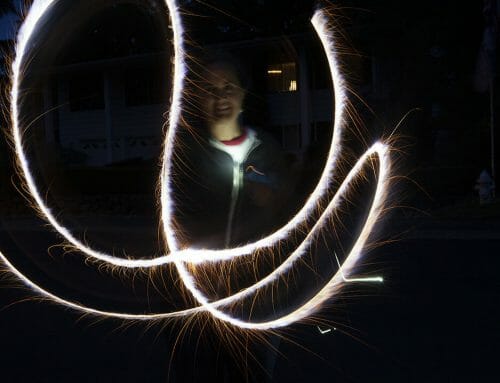
Here’s a fun way to try this out and get your kids involved! It’s blurred action technique called “Light Painting”. You have to do it a night so in a room or outside where it can be fairly dark. Here’s how you do it;
- Put your camera on a tripod or stable surface
- Give your kids a flashlight or turn on the flashlight on on your phone (or sparklers!)
- Turn the flashlight towards the camera
- Put your camera on the Shutter Priority Mode (S or Tv)
- Set the shutter to about 13 seconds (13”)
- If inside, turn out the lights
- Use your remote trigger or use the timer to open the shutter
- Have your kids spell their names, draw hearts, swirls or whatever they want to do!
- Have them flash the light on their faces quickly before the shutter closes
You should have some super fun image! Kids love being involved in these kind of shots! If the image is too bright or too dark, make the adjustments with your shutter speed.
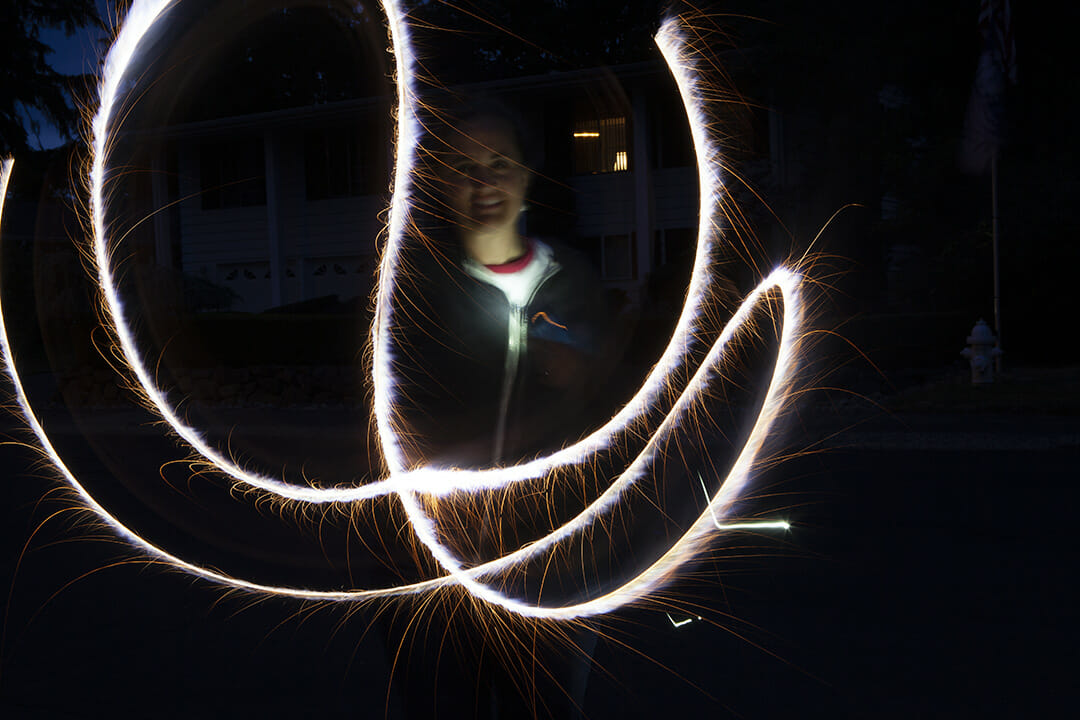
This shot I took of myself by setting the camera on a stool, setting the shutter speed at 5 seconds (5″), putting it on the timer mode so I could be in front of the camera and then running around and playing with a sparkler! I also used my phone flash light to shine on my face quickly.
